Surely I am not the only one who is already itching for spring before we've even undecorated the christmas tree.
Perhaps part of that was buying slightly wilted and over-priced basil at the supermarket for our New Year's Eve Dinner and longing for the days when I had a little boxed herb garden on the sill of my kitchen window.
So to appease my longing for spring I've pulled some rather inspiring shots of indoor "gardens."
Hopefully soon enough our kitchen will be less of a construction zone and better lend itself to putting up my own new windowsill garden.
Showing posts with label kitchen. Show all posts
Showing posts with label kitchen. Show all posts
Saturday, December 31, 2011
Monday, December 12, 2011
Adventures in Applesauce
Yesterday we cracked into the very last jar of applesauce from last year, so it's a good thing Richard used the last of our bushel of apples to can eight more jars last weekend.
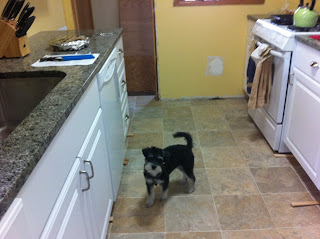
Wicket was very interested in getting some of those apple scraps.
The finished jars, all ready to store in the pantry... as soon as we put shelves in the pantry.
Wicket was very interested in getting some of those apple scraps.
The finished jars, all ready to store in the pantry... as soon as we put shelves in the pantry.
Thursday, November 10, 2011
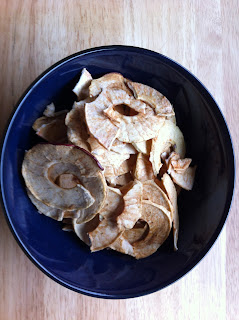
DIY Apple Chips
Last week I whipped up some spoon butter which has done wonders for the wooden tools and table in our kitchen but this week I went with something actually edible - apple chips.
As soon as I got out the peeler Wicket positioned herself underneath it waiting for some scraps to fall.
The peeler made quick work as it cored and sliced the apple all in one step. Then into the dehydrator they went for a few hours.
I made the first batch on Tuesday, and when Tia came over today we made a second batch, this time with sugar and cinnamon, so we have plenty to share.
Saturday, November 5, 2011
DIY Spoon Butter
There's a wonderful wooden bowl in our kitchen that we received as a wedding gift from one of my cousins that I absolutely love to pieces. Usually I care for it by rubbing it down with mineral or olive oil every so often but lately I noticed that my habits weren't really cutting it any more. Of course I found the answer on Pinterest - Spoon Butter.
I picked up a pound of natural beeswax last week at Michaels Crafts, and picked up a new bottle of mineral oil from the supermarket while grocery shopping the other day, so on Tuesday in between loads of laundry and unpacking I whipped it up in the kitchen. And then Wicket and I took a walk over to my in-law's to borrow a ring and lid because I still haven't unpacked most of our canning supplies and really I'm not quite sure where they are.
I cut off roughly a quarter of the block of beeswax but used my postal scale to be a tiny bit more accurate in my measuring. I've already rubbed it onto my prized wooden bowl and I'm trying it on a corner of the kitchen butcher block table before I coat the whole thing.
Cost Breakdown
- One pound natural beeswax (from Michael's Crafts in the candle making section with 40% coupon) - $10
- Mineral oil (Pick N'Save) - $2.50
- Quart canning jar - on hand
Total: $12.50
Per Jar: $5
I only used a quarter pound of beeswax so it even though I spent about $12.50 to make it this first time it really costs just over $5 per jar, and it looks like it should last a while. I'm contemplating throwing together three more jars from the left over beeswax to give as gifts this Christmas.
Sunday, October 30, 2011
Our House and the New Granite Countertops
Richard and Matthias dismantling the old kitchen cabinets. We had planned to hang the old cabinets on the back wall of the garage for storage, but in truth they were too far gone so Richard has been cutting them up to dispose of them slowly. And if you look real close you can see the peeling paint that was the bane of my existence for far too long.
Here's the kitchen after we'd installed all of the new cabinets the night before the granite guys came to install the countertop.
Now with brand new granite couptertops! Not exactly Martha Stewart's kitchen, and not quite as organized as I'd like yet but it's a wonderful and welcome change from before.
Wicket approves.
A close-up of the countertop - the color is called "Mountain green" and is a really light mix of white, gray, and black with just a tinge of green.
Monday, September 26, 2011
October and Kitchen Updates
 This next month is just packed.
 With all luck the kitchen should be in the finishing stages by the end of the day tomorrow. Here's what the kitchen looks like this evening, just ignore the plywood countertops and small hole in the wall. The countertops are being installed in the morning, and I'll spend the day working on fixing up the pantry. I can't wait for the real counter to be in and have the available real estate to unpack the rest of the kitchen boxes, AND have a working kitchen!
We want to have our families over on the weekend of October 8 for a housewarming party, and then a little shindig the next weekend with our friends. And I'll be hosting the next crafternoon the following Sunday. Quite a lot of hosting will be going on over here, and I can't wait for some of our friends and family to finally see the house for the first time!
And I certainly can't wait to have more boxes unpacked, and a bit more living and working area, instead of just working our way around the stacks of boxes. And with October my projects will resume! How exciting!
Subscribe to:
Posts (Atom)


